

Written by Katie Larsen, in collaboration with Vanessa and Adam Hickey, Mary Ashley Krogh, Owen Chikazawa, and Brittany and Drew Neumann. Sponsored by 76®. Don’t forget to check out their First 30 Day series, all about diving into vanlife and life on the road!

The electrical system can be one of the most daunting phases of a van build.
The amount of information that is out there often leads people to hire an electrician for this portion of a build. While this is totally understandable, it is also manageable to complete as a DIY – you just have to put in the research and time. Readjusting your electrical system plan numerous times before actually finalizing anything is quite common. If you choose to lay insulation first and wiring directly after, it is still in the beginning phase of the build and your confidence may not be through the roof. Nonetheless, you can push forward with the help of YouTube tutorials, van forums, and this guide!
The first step is deciding how you want to receive power.
There are three main options for receiving power in your van:
- Solar system – an electrical system that converts sunlight into usable electricity to power your van
- Charging from the alternator – a way to charge your electrical system’s battery bank while your van is running
- Shore power – physically plugging your electrical system into an outlet at a campground, family or friends house, etc.
Most van builds have a solar system combined with one of the other two options, while some builds choose to have all three power sources. It’s easy to spend a large portion of your budget on wiring and electrical, but it is better to over-prepare rather than find yourself underprepared and underpowered. Having too much power is hardly a bad thing but having to rework an electrical system can be quite frustrating.
Next, you need to determine which items you want to run on your electrical system.
This requires purchasing any items that will draw power, or at least having knowledge of their measurements and knowing how much power they require to effectively run. This will determine how large of a system your build will require, helping you decide how many and what size/amp hour batteries you will need, as well as how many solar panels and what size/wattage you will need.
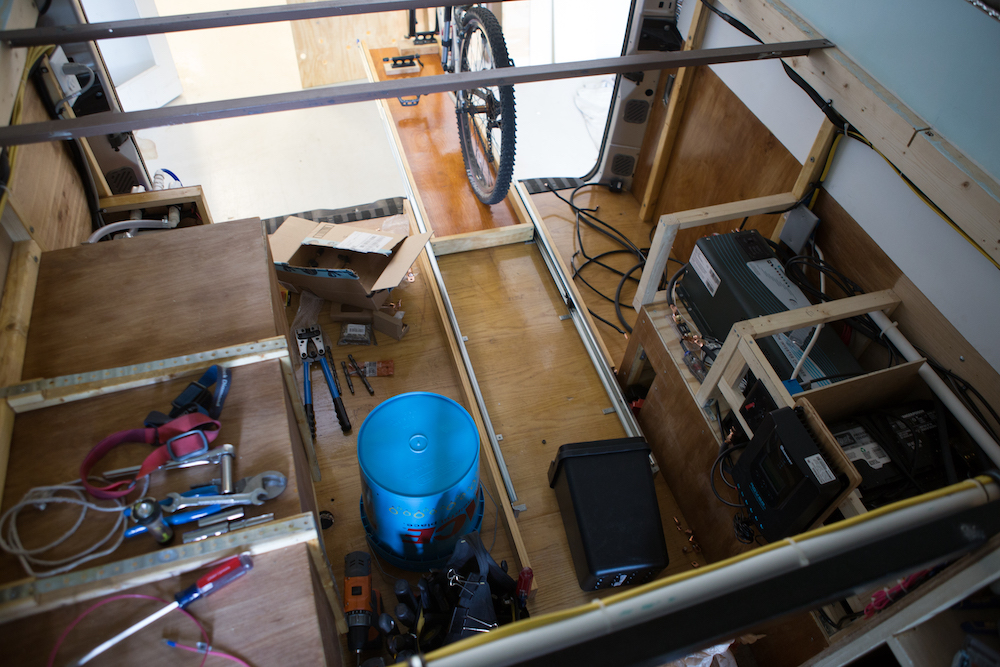
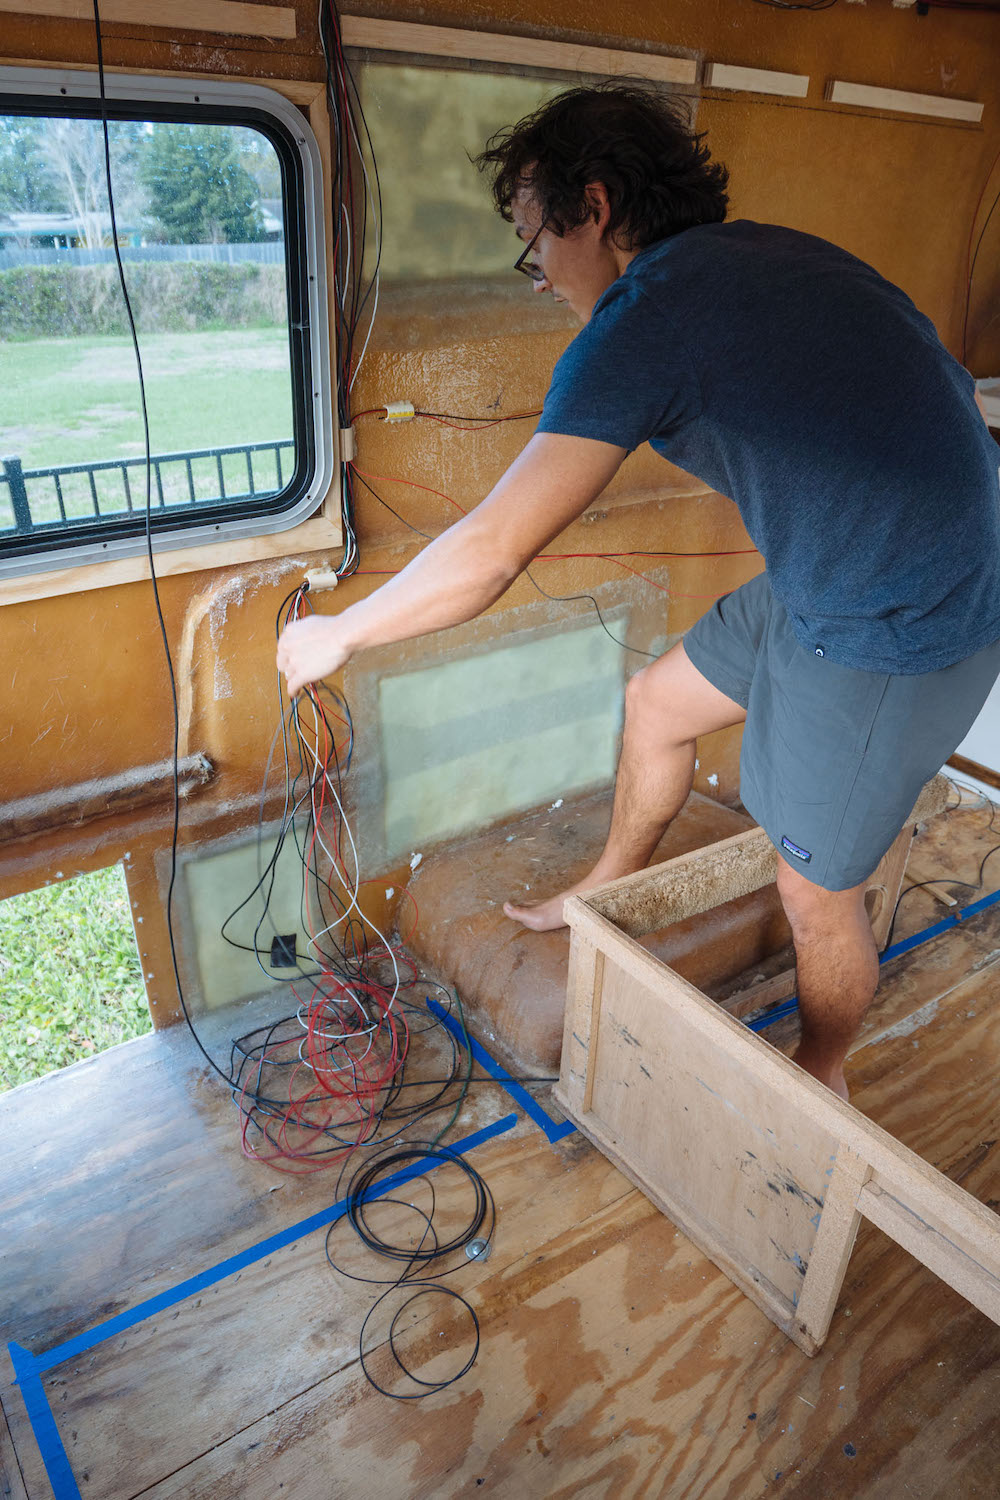
The next option to consider is wiring your van before installing your insulation and walls, or as late as after installing your cabinets.
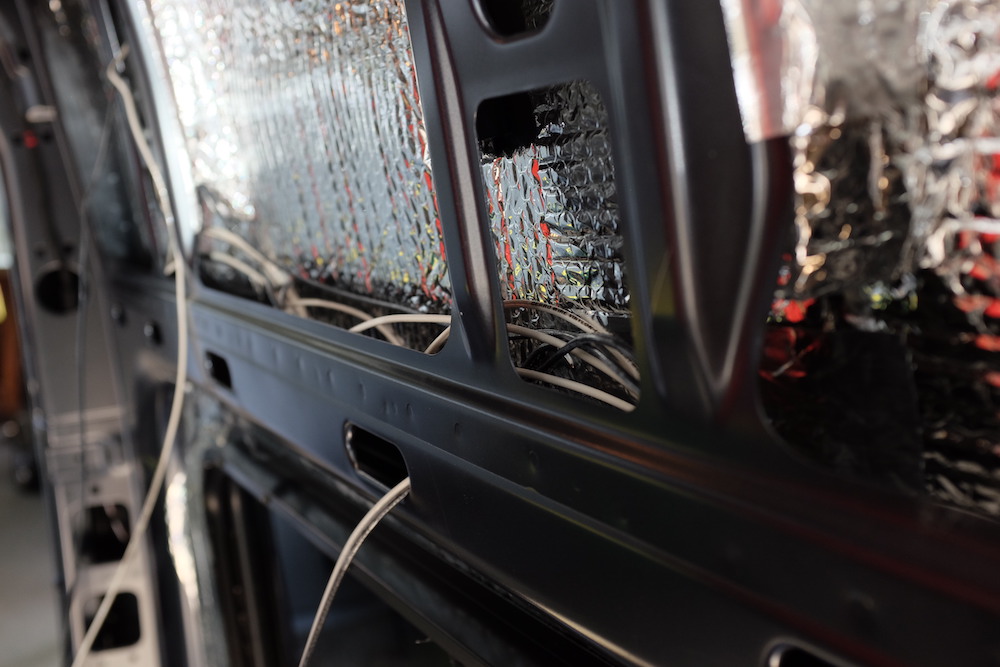
If you decide to wire your van before installing insulation and walls, you will have to be very intentional in planning out your design and knowing where to pre-place the wires. This includes your fridge, any switches (light and water pump), ceiling fan, heater, outlet/USB ports, etc. If you choose to wire your van after your cabinets are installed, you will simply have to drill small holes in unseen areas of your build, allowing you to run wires through your cabinets, benches, and storage areas.
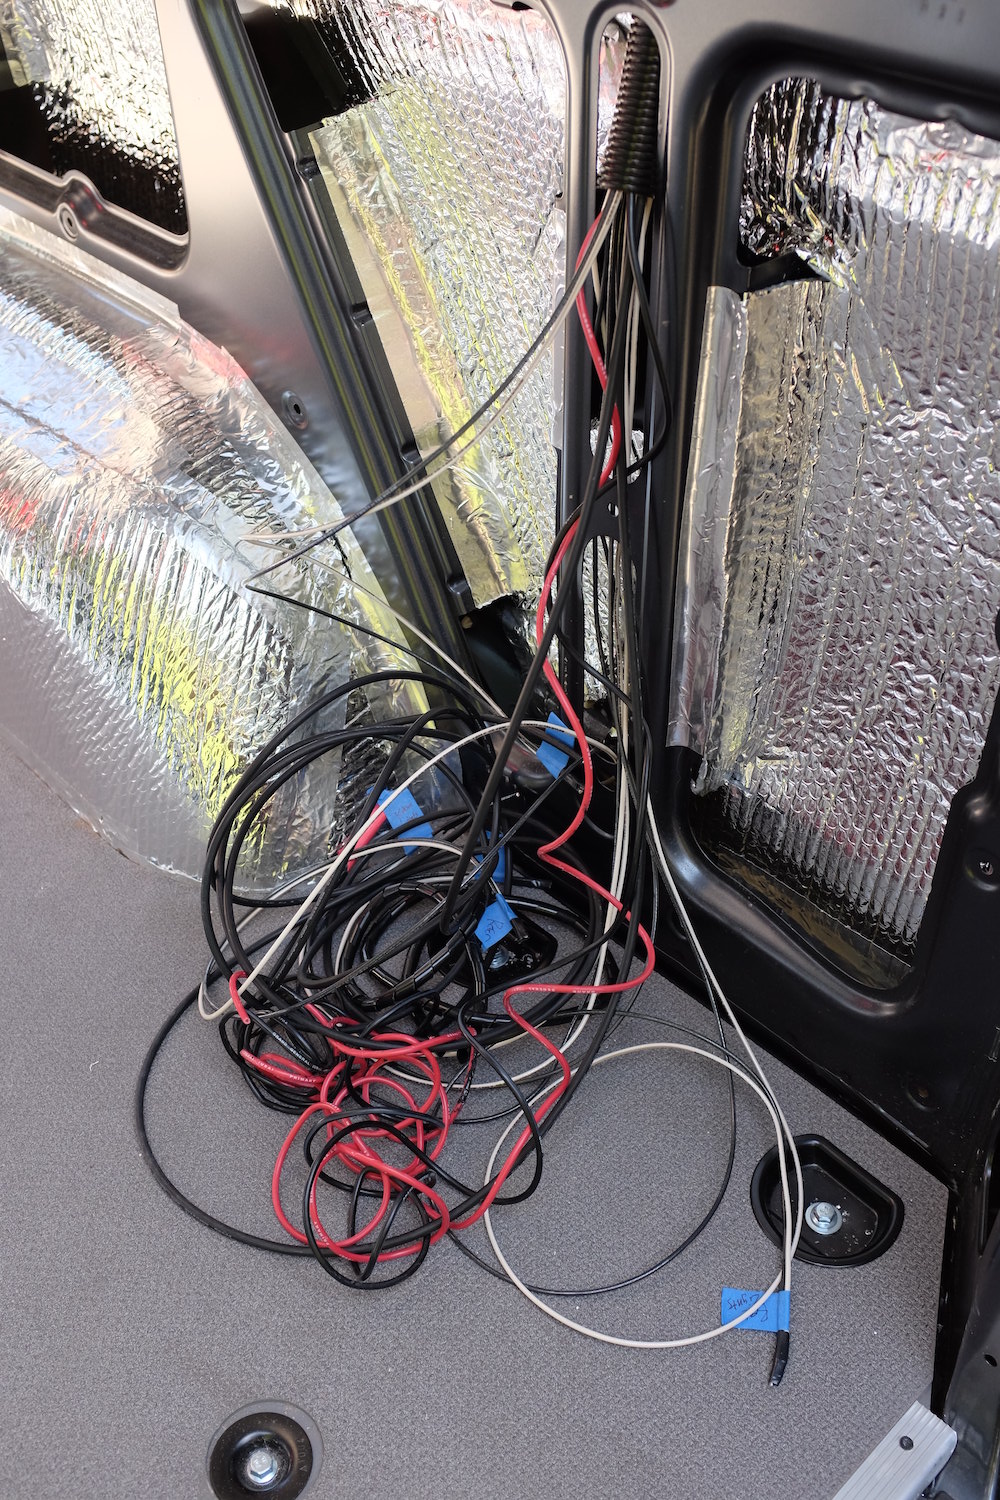
“For wires, we used 12 gauge for the 12-volt system and 14 gauge for the receptacles. We chose to use stranded wire because it is more flexible and easier to make turns and curves in tight spaces.” – Vanessa and Adam

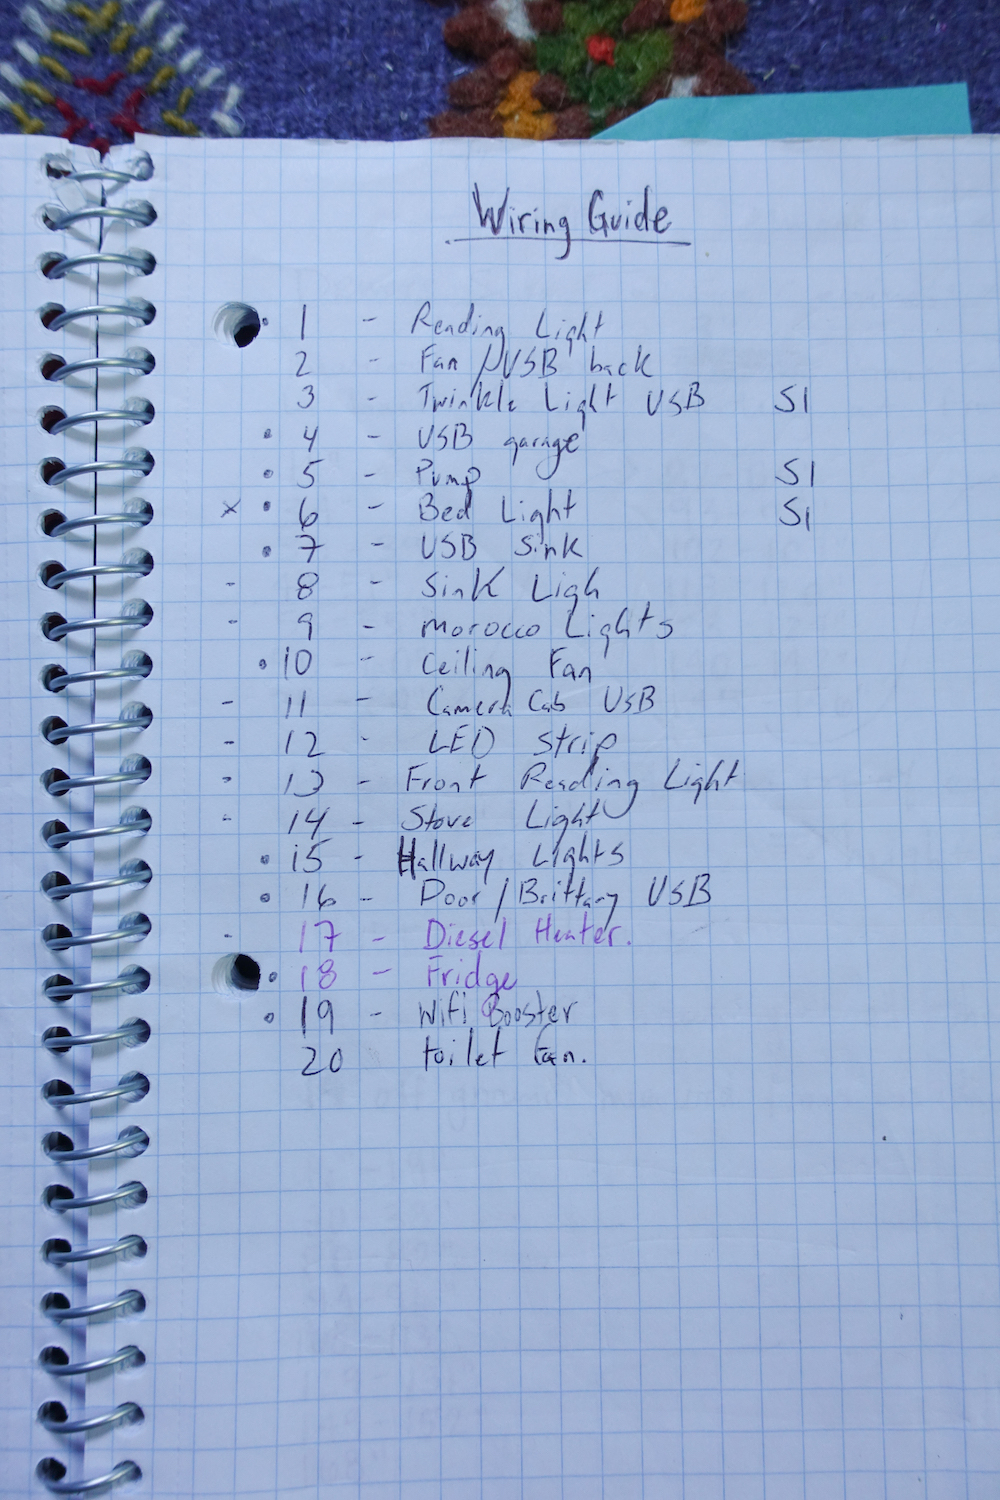
Pro tip: While you are laying wires, label them accordingly with their size and what they are wired to. You can use blue tape, post-its or anything else that will stay put. This will help avoid any confusion!
“As we built out various areas of the van, such as the walls, bed, closet, futon, cabinets, and kitchen, I worked the wires in, one feature at a time. This made it super easy to connect the wires through a 12 connection fuse block and wire the inverter and batteries.” – Brittany and Drew
“To keep things nice and organized we did a lot of planning beforehand. We mapped out approximate locations of all the devices that would need power and then ran wire before we put in our walls. By doing this we were able to keep the wires out of sight.” – MAK and Owen
Next, you need to decide what materials you want to build your electrical system.
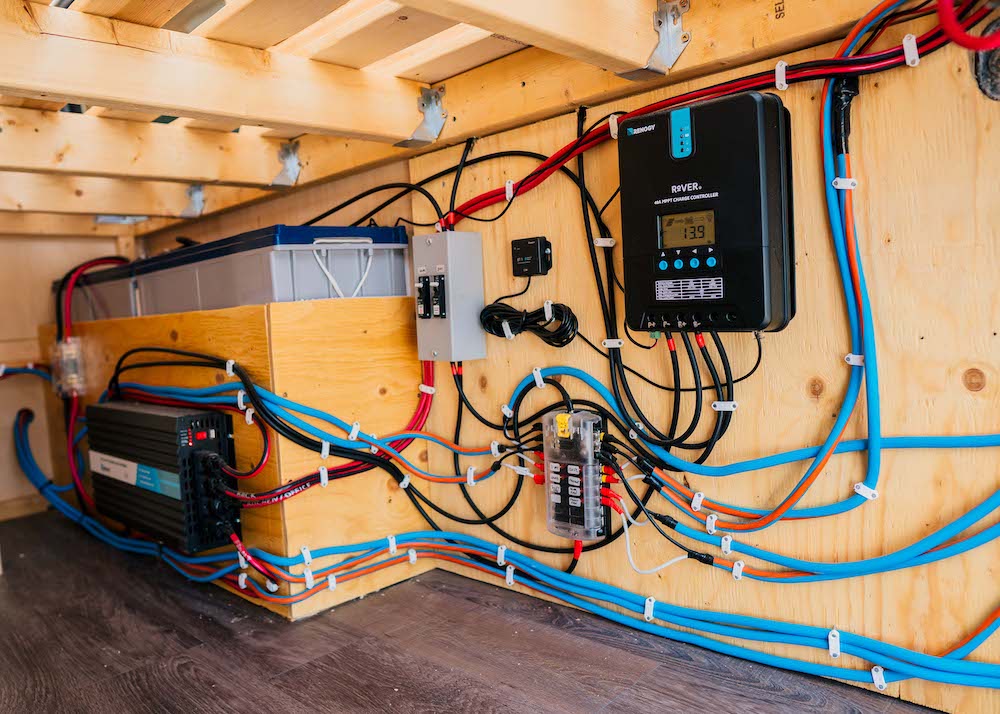
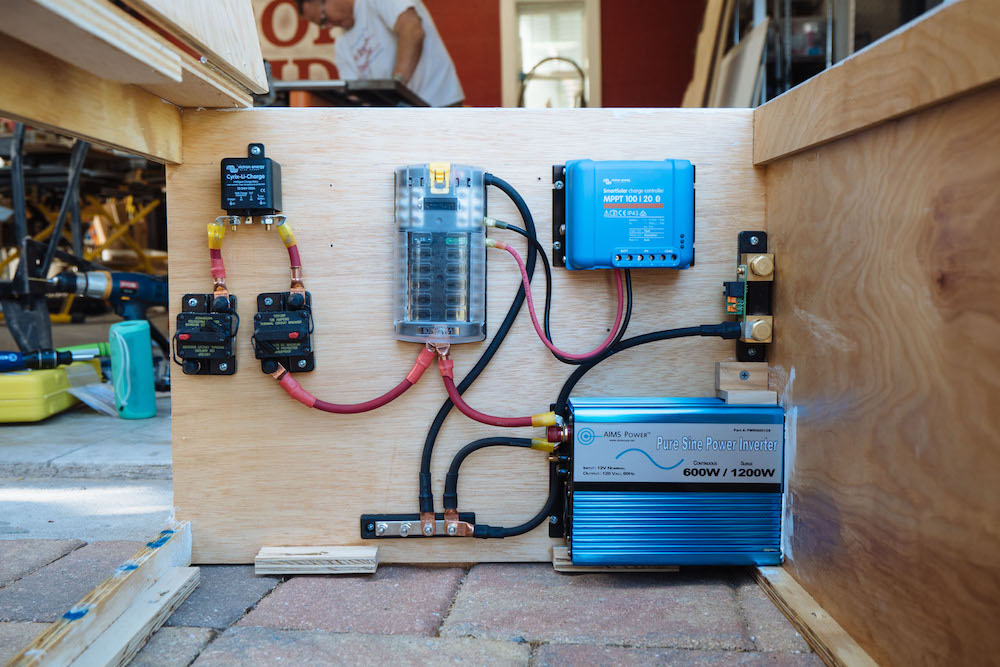
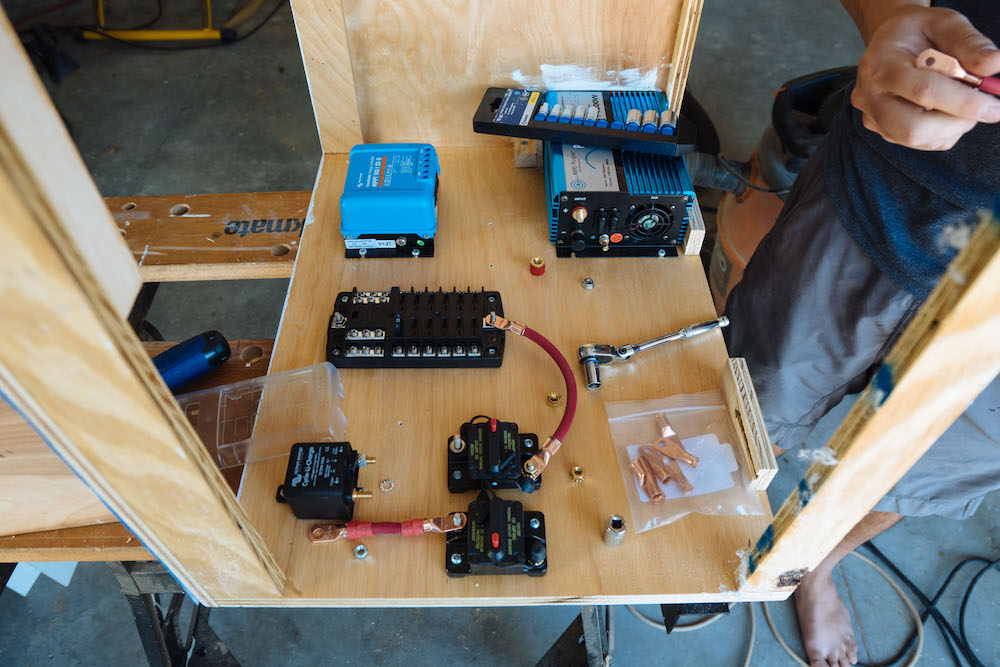
Here are the common main components of an electrical system:
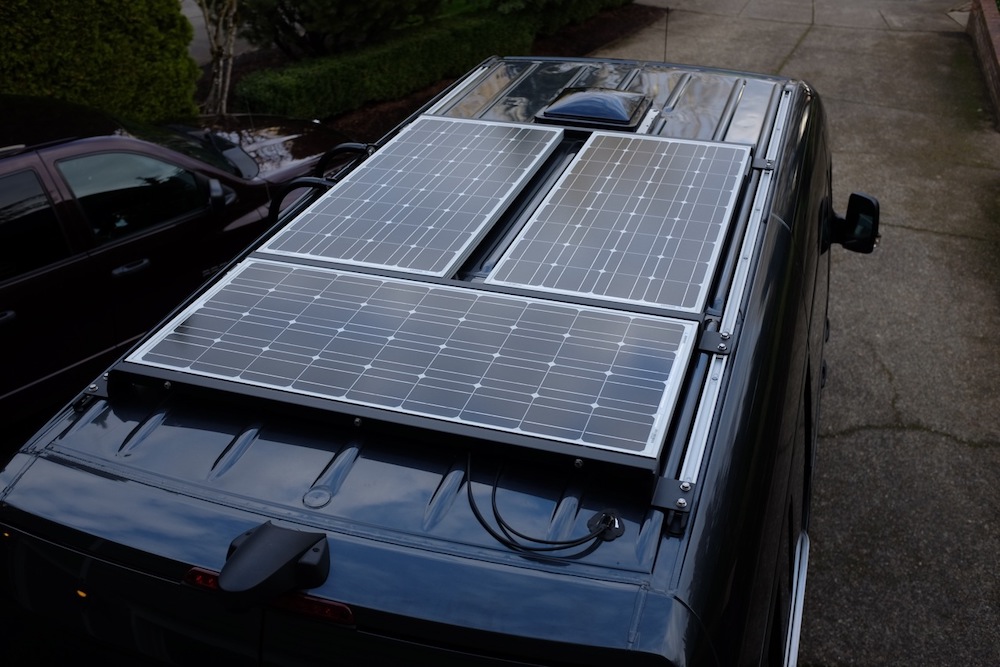
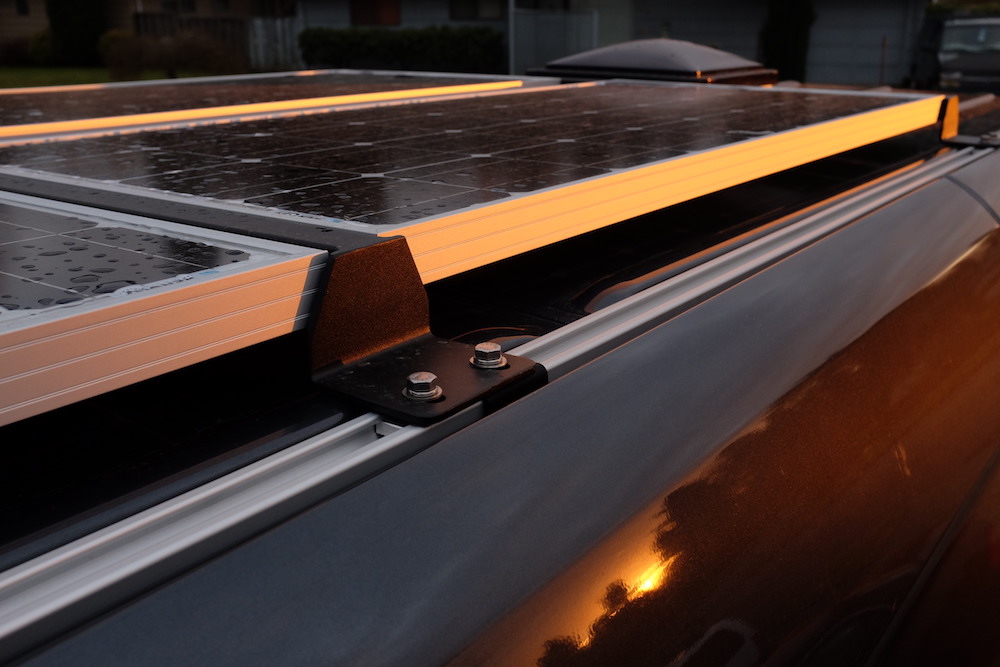
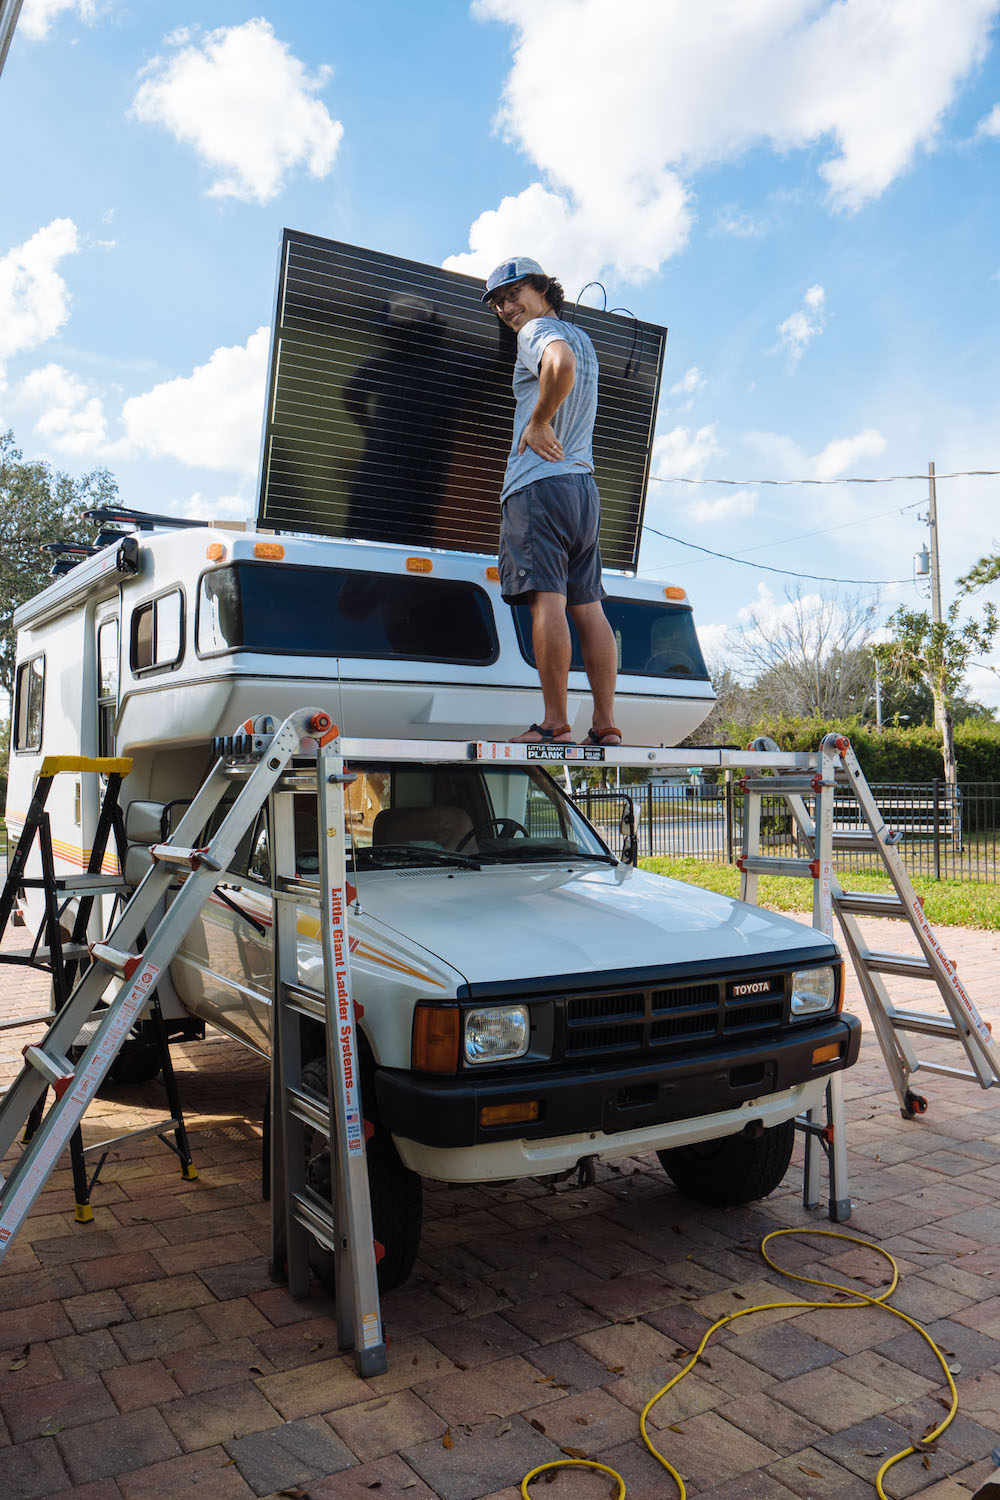
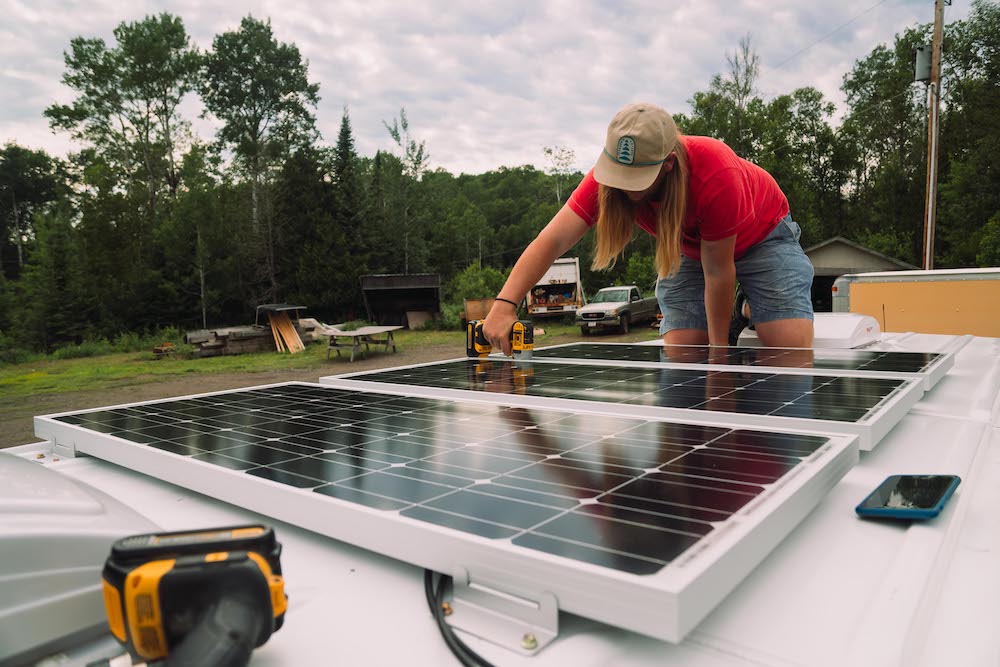
- Solar panels – the device that actually absorbs the sun’s rays, converts them to electricity, then sends the electricity to your battery bank
- Monocrystalline – most efficient, space-efficient, longer lifespan, more expensive
- Polycrystalline – less expensive, less efficient, lower lifespan
- Flexible – shorter lifespan, lowest efficiency
- Batteries – the bank that houses all the electricity for your system
- Solar charge controller – regulates the amount and rate that electricity is sent to your battery bank
- Fuse block – the device that houses various fuses that connect the electricity from your battery bank to your individually wired items throughout your build
- Circuit breaker – a device that protects your system from an electrical current overload
- Pure sine inverter – a device that takes 12V energy from your battery bank and converts it into 110V usable energy for household items
- Appropriate gauge wiring – what connects all the devices throughout your electrical system
*If you don’t feel comfortable tackling these components individually, you can purchase a solar panel starter or premium kit that will simplify the process and provide detailed installation instructions.*
Pro tip: Once you are near the end of installing your electrical system and everything is in its proper place, use wire clamps or wire loom to keep your wiring neat and tidy! This may also help avoid any future damage by keeping the wires contained.

Examples of Working Electrical Systems
- 3 Renogy 100 Watt Monocrystalline Solar Panels
- 4 Vmaxtanks Deep Cycle Marine Grade Batteries
- Renogy 40 Amp Solar Charge Controller
- Blue Sea Systems Fuse Block (with 12 circuits)
- Blue Sea Systems Circuit Breakers
- Wiring (2/0, 4, 10, 12, 16 gauge)
- 300W of Monocrystalline Panels
- 40 AMP MPPT Charge Controller
- 400AH Pure Gel Battery Storage
- 2000W Pure Sine Inverter
- 12Volt Fuse Block
- 40 AMP ANL Fuse in between Charge Controller and Battery
- 2 – 100 AMP ANL Fuses in between Battery and Inverter
- Sure Power Battery Separator to charge from van’s alternator
- Wiring to connect all components together
- 300 Watts of 12V Monocrystalline Solar Panels (Compact Design)
- 40 AMP MPPT Charge Controller
- Bluetooth Module Solar Charge Controller Monitor
- 3 92Ah AGM gel batteries (276aH total)
- 2000W Renogy Pure Sine Wave Inverter with LCD remote
- 40 AMP Breaker Fuse in between Charge Controller and Battery
- 30 AMP Breaker Fuse in between Charge Controller and Battery
- Blue Sea Systems 175 AMP Fuse Block Terminal on Battery Terminal
- 200 AMP ANL Fuses in between Battery and Isolator
- 12Volt Fuse Block for all LED Lights, USB Ports, Switches, Various Accessories
- Wiring (2/0 for Inverter to Batteries. 1/0 Isolator to Battery Bank. 10 gauge wire for solar panels and to 12V Fuse Block to Batteries. All 12V wiring is 14 gauge.)
- Bosch Electric Mini-Tank Hot Water Heater 2.5 Gallon
- 120V Wiring is Romex with Shallow Blue PVC Box and plate covers